需求描述
最近老季在用Python3,Django写项目,这边具体记录一下在Docker下如何安装uwsgi来运行Django。

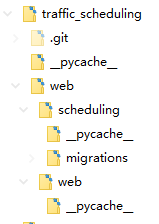
注意:本项目代码已在宿主中生成过项目及文件,创建项目方法请移步:django入门教程 创建项目(Project)和应用(App)
宿主Docker命令
docker run -itd -v D:\wwwroot\:/data/wwwroot -p 8001:9000 --name juwsgi --link jnginx --link jmysql centos /usr/sbin/init这里我们只在linux系统中安装了 uwsgi 来运行python的web环境,mysql已单独运行在其他容器中。
创建映射文件
在 d:\wwwroot\traffic_scheduling 中创建 uwsgi.ini 的配置文件
[uwsgi]
# Django-related settings
# the base directory (full path)
chdir = /data/wwwroot/traffic_scheduling/web/
# Django's wsgi file
module = web.wsgi
# the virtualenv (full path)
# home = /path/to/virtualenv
# process-related settings
master master = true
# maximum number of worker processes
processes = 2
# the socket (use the full path to be safe)
# socket = /path/to/your/project/mysite.sock
socket = :9000
# ... with appropriate permissions - may be needed
# chmod-socket = 664
# clear environment on exit
vacuum = true
buffer-size = 32768
pidfile = /tmp/uwsgi-IRM.pid
daemonize = /tmp/uwsgi-IRM.log
uwsgi中的socket
uwsgi监听的socket,可以为socket文件
socket = /www/wwwroot/web/script/uwsgi.sock或 ip地址+端口号
socket = :9000用nginx的时候就配socket , 直接运行的时候配 http
指定IP端口 // 直接外部访问
http-socket = :9000进入容器
docker exec -it juwsgi /bin/bash在容器中运行命令
1、在Centos容器中运行安装Python3
2、在容器中运行pip命令
pip install --upgrade pip
pip install django mysqlclient uwsgi
ln -s /usr/local/bin/uwsgi /usr/bin/uwsgi
测试你的Django项目
现在,我们想让uWSGI做同样的事,但是返回一个Django站点而不是 test.py 模块。
如果你还没有这样做,那么请确保你的 mysite 项目实际上正常工作,在终端中运行如下命令:
python manage.py runserver 0.0.0.0:9000
在浏览器中输入 http://127.0.0.1:9000 。
如果正常,在终端中ctrl + c 取消,然后在终端中进入目录 /data/wwwroot/traffic_scheduling/web/ ,则使用uWSGI来运行它:
uwsgi --http :9000 --module web.wsgi
module web.wsgi: 加载指定的wsgi模块
将你的浏览器指向该服务器;如果站点出现,那么意味着uWSGI可以为你虚拟环境中的Django应用服务,而这个栈工作正常:
the web client <-> uWSGI <-> Django
现在,通常我们不会让浏览器直接与uWSGI通信。那是web服务器的工作,这是个穿针引线的活。
配置Nginx容器
Docker 安装 Nginx 映射本地文件 多虚拟主机 图文教程
示例配置文件如下
# mysite_nginx.conf
# the upstream component nginx needs to connect to
upstream django {
    # server unix:///path/to/your/mysite/mysite.sock; # for a file socket
    server 127.0.0.1:9000; # for a web port socket (we'll use this first)
}
# configuration of the server
server {
    # the port your site will be served on
    listen      8001;
    # the domain name it will serve for
    server_name .example.com; # substitute your machine's IP address or FQDN
    charset     utf-8;
    # max upload size
    client_max_body_size 75M;   # adjust to taste
    location /static {
        root /data/wwwroot/traffic_scheduling/web/; # your Django project's static files - amend as required
    }
    # Finally, send all non-media requests to the Django server.
    location / {
        uwsgi_pass  django;
        include     uwsgi_params; # the uwsgi_params file you installed
    }
}
Centos下请关闭SELinux,否则会出现 403 forbidden (13: Permission denied) 。关闭SELinux的两种方法
部署静态文件
在运行nginx之前,你必须收集所有的Django静态文件到静态文件夹里。首先,必须编辑web/settings.py,添加:
STATIC_ROOT = os.path.join(BASE_DIR, "static")
然后运行
python manage.py collectstatic
基本的nginx测试
重启nginx:
/etc/init.d/nginx restart
要检查是否正确的提供了媒体文件服务,添加一个名为 media.png 的图像到 /data/wwwroot/traffic_scheduling/web/static 目录中,然后访问http://example.com:8000/media/media.png – 如果这能正常工作,那么至少你知道nginx正在正确的提供文件服务。
值得不仅仅是重启nginx,而是实际停止然后再次启动它,这将会通知是否有问题,以及问题在哪里。
在宿主中查看是否可以成功运行
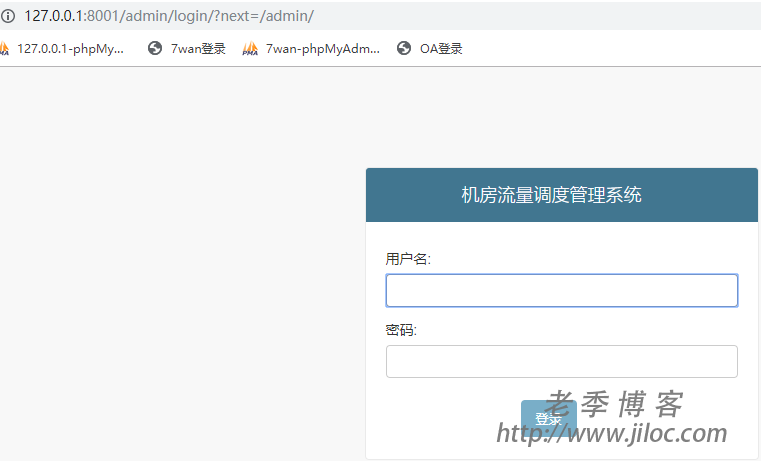
在浏览器中输入 http://127.0.0.1:8001 查看是否运行成功。


发表回复